"Sure...Just make sure you said that you did the editing, not me."
Of course Mom, I wouldn't want to taint your image. :)
So since photo editing is a relatively unexplored, new territory for me, I thought we could go through it together. Today we'll go through some of the basics. (There are many, many more complicated and professional methods, but the following will be good to start off with, I hope!)
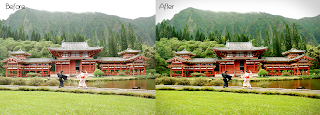
First, open up your photo (in this case one of my e-pic teasers) in Photoshop. It's a .jpeg below, but you're much better off working with .raw's if you have them. Mom-Penga only gave me the .jpegs, so it'll have to suffice.
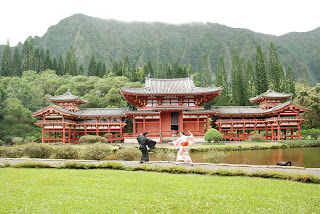
Mortallll Kommmbaaattt!
Now let's play! Open the Layers window by pressing F7
(or Windows -> Layers)
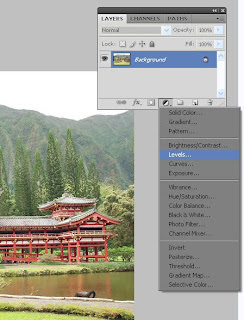 Press the little ying yang shape at the bottom of the window, which will cause the "Adjustment Layers" menu to drop down. All of these choices make some pretty cool effects, but for now let's stick with the "Levels" option. Click it open.
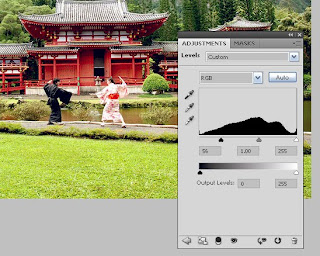 Slide the little triangles around beneath the graph to enhance the pixel brightness and darkness. The more you move the leftmost triangle to the right, the darker the colors become. Play around with it til you find something you like, in this case I just moved the leftmost triangle closer to the center. See how much more vibrant the colors are already?
Next adjustment layer - go back to your Layers window and select "Curves"
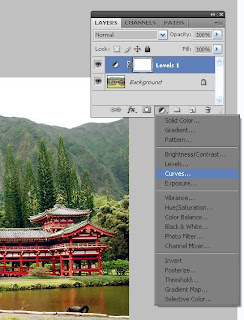
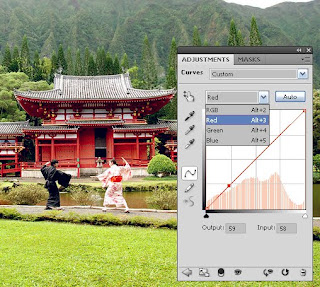 Levels, basically, help you adjust the color. You can do overall color by using "RGB", or individual set the reds, blues and greens. Adjust the image by clicking on the graph to move the color "curve". I tweaked the red and the green just a little bit, making them brighter.
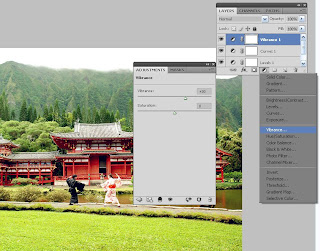
For a finishing touch, I opened up a third adjustment layer, "Vibrance", and increased the color vibrance a little.
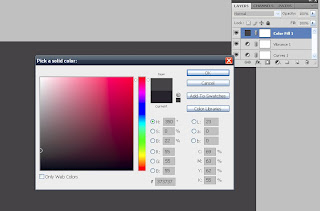
Now I want to polish this image up. Open up a fourth adjustment layer, "Solid Color" and pick a color. I used a dark grey, since I want a bit of a shadow around the edges.
Now go to the Layers window and find the Opacity drop down. Decrease the percentage until you can see your image underneath, whatever your desired amount. I decreased my percentage to 25%. (This is the last adjustment layer I'll use for this picture, but there are many more - and they all do really cool things, so feel free to experiment! Then tell me what worked out the best!)
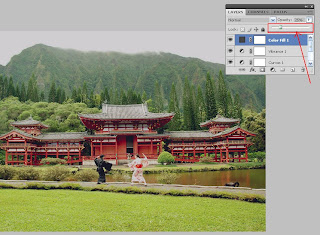
Now let's lighten up the middle. I grabbed the eraser tool, put it on a big, fuzzy brush, and just erased the parts I didn't want dark. (The program will ask you to "rasterize the fill" before allowing you to use the eraser. Just press "okay".)
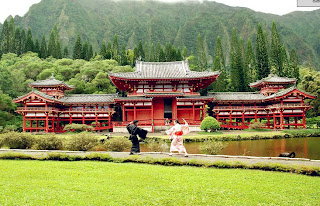
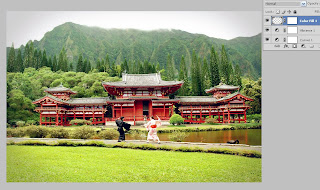 After wiping out the middle, now only the edges are dark, giving the picture a bit more depth.
Lastly, I cropped the image a little on the left in order to have better symmetry.
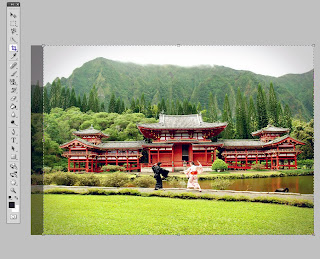
Save, and you're done!
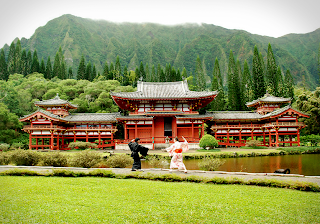
Think it was worth the effort? (Click the image to make it full size!)
(Next time, we'll do it the even easier way - "actions"!)
I know we all love a good edited picture - what's your favorite style? Matte pastels? Vintage? Bright and colorful? Black and white? (I love them all!)


You are SO helpful. You're convincing me to get photoshop as every day goes by :)
ReplyDeleteTotally fowarding this to my fiance. He was just saying last night that he needed to learn photoshop. Perfect timing!
ReplyDeleteThat is some awesome photo editing, are you using that photo for your Save the Dates??
ReplyDelete@hannah - you really should get it! or one of those free open-source programs that are similar! It's a lot of fun!
ReplyDelete@Courtney - do let me know when your FI comes up with some awesome stuff!
@AZ - I sent out my stds a while back (http://wedcon.blogspot.com/2009/08/save-dates-phase-3.html), but this would have made a pretty cool picture too! lol!
holy cow--that's amazing! where did you learn that stuff? thanks for putting together this awesome tutorial.
ReplyDelete