Friday, December 18, 2009

Bag "Bliss - Step 3

Dun, Dun, Dun...and now, the final chapter in the epic bag-blitz!

(Catch up with Step 1 and Step 2 if need be!)

We printed, we sewed, and now it's time for drawstrings - so grab your materials and let's go!

In addition to the assembled bag, we'll need string

and some eyelets/eyelet-setter.

(I'll be using a Crop-A-Dile, which I looove)


Now remember how I said we'd stick the eyelets in before sewing the bag all the way around? Well, if we didn't do it that way, I wouldn't be able to fit the Crop-o-dile in to punch the holes! So start with the unsewn bag, and mark off where you want to put your eyelets. They should be towards the bottom of the bag, on either edge of the side that rests against your back. We'll be using two eyelets per side, since these particular eyelets are too small to fit two strands of string in one.

We measured down 18" to the point where the ruler hit the curved line we drew.

Then we went 1.5" up from that point and made our first position marking.

Repeat on the other side, then lay the ruler between the two points.

Measure 3/8" (3 ticks on a inch ruler) inwards, and make second position marks on each side.

Now we're ready for eyelet setting.

Punch out holes where you made your position markings. Make sure you only punch through one layer of the fabric!

Insert an eyelet to the hole, with the finished side facing the "right-side" of the bag.

Now Squash the eyelet down with your setter. (a.k.a., the "fun" part!)

Here's what it should look like on the "wrong-side" (inside) of the bag.

And again, on the "right-side" (outside)

Now put the bag down for a moment and grab your string. You'll need two equal lengthed pieces of your size preference. We used 72" pieces that we bought from Home Depot. Melt down the ends of the string to prevent fraying (only if you're using synthetic ropes! Natural fibers will go up in flames!)

We used a piece of wire to help guide the strings through the flaps.


With the bag right-side out, thread the strings through the eyelet holes.

Tie an overhand knot to secure the strings.


And D O N E spells done!


Logistics -
163 bags total - 157 good bags, and 6 fail-bags, so that's a yield of about 96%.

Cost Breakdown
fabric = $1.84/bag
eyelets = $0.15/bag
string = $1.04/bag
Emulsion and ink: $0.21/bag
Capital cost for Crop-A-Dile, YUDU, screens: $283
Total Project Cost (material + capital) = $810.52 total, $5.16 per good bag.
Total Project Cost (material only) = $527.52 total, $3.36 per good bag.

...Which, if we ignore any operating costs (free labor!), falls below the $5/chair I was quoted for chair cover rentals. Huzzah! :D

Now, if only I knew how to fit them all into my suitcase...

What's the first thing you did after finishing a major project? Take a relaxation break, or jump right into something else?

Thursday, December 17, 2009

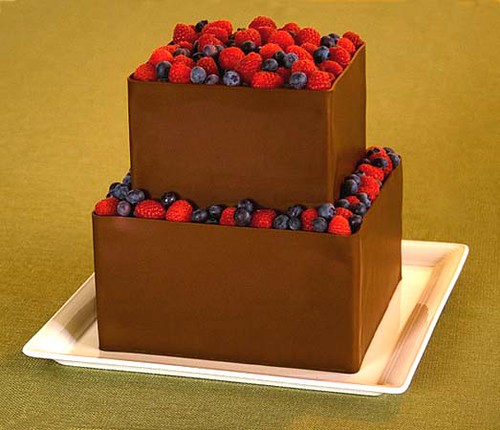
Cakie! - The Frosting

Friends, let me tell you about my latest fixation:

Princess Cake.


This Swedish treat features delicately sweetened vanilla cake, filled with raspberry jam and fresh cream. It's moist, yet sturdy, and shaped to perfection with a layer of marzipan frosting.

It is amazing. I suggest you all find the nearest Swedish bakery and try it out.

But the reason I bring up this mouthwatering morsel is mainly because of the frosting. There are, it seems, alternatives to the standard buttercream or fondant choices. Let's discuss:

-Buttercream
Made mostly of butter and sugar, this is the standard (and cheapest) cake frosting. Tasty, no frills, icing. It's easily piped around into flowers or basket weave patterns. It is, however, more difficult to create smooth, flawless looking surfaces. You also can't make fancy-sturdy models with it.

-Fondant
A standard for smooth, tiered wedding cakes these days, commercial cake fondant is made of gelatin, glycerin, glucose and powdered sugar (sounds, delicious, doesn't it? :P). You can also make your own with marshmallows, if you prefer. It's more costly than buttercream, and tastes like..well, it doesn't taste like much. It's usually just peeled off and left uneaten. It cannot be used for piping, but can easily be molded into desired shapes and appliques, and has excellent structural strength.

-Royal Icing
This is the hard, meringue-like substance on decorated sugar cookies and pre-made candy cake decorations. It's a bit brittle and inflexible as a cake cover, but would work for making sturdy piped details or appliques. It's made mostly from egg whites and sugar.

-Ganache
Ganache is made of chocolate and cream, and tastes like a dream. However, it is super soft and prone to melting, so don't even think about using it for gravity-defying cake architecture, cause you won't get any support from this!

-Modeling Chocolate
Perfect for creating rigid, complex structures, modeling chocolate can make for a super-sweet alternative. It's made of chocolate and a sugar syrup, but I'd still be a little wary about the melting factor.

-Marzipan
Made of sugar and ground almond meal, marzipan makes for a great cake-cover when rolled out thinly. Let me emphasis thinly, as this frosting packs quite a flavor punch. It's best paired with simpler cakes like vanilla, since the almond flavor can overwhelm anything more complex. But boy, is it ever delicious! Structurally, it works similar to fondant, though it can become too brittle when dried out. One other note - marzipan apparently only comes in about 2 colors, green and ivory/almond color. Though I'm pretty sure you can dye the natural almond color to your preferred hue...

I'm definitely going to ask any potential bakers what our frosting options are. Sak is definitely pro-anything-chocolate, but I'm not sure if it would hold up in the Hawaii-heat. And I love the marzipan, but it might not go well with guava-coconut cake. Yet even if we end up back at fondant and buttercream, at least now I know there are other alternatives I need to "taste test"!

What are you covering your cake in?

Wednesday, December 16, 2009

Bag "Bliss" - Step 2

Continuing on with the next installment of the big-bag-adventure (Step 1 is here), we have the sewing!

At about 100 inches of sewing per bag, this adds up to roughly 1,000 feet of "mileage" on my little sewing machine. Good thing we bought those giant spools of thread!

We start with our printed sheet of fabric, which is a 18" x 47" size. This is a tad larger than the average backpack, since it was meant to fit the reception chairs, so if you want to make your own for non-chair use, I suggest making it a couple inches shorter in length.

Next I sewed over the top edge and 3-4 inches down each side. I tried to make this fold as small as possible, since the only purpose it serves is to hide the raw edges.

Now, fold over the top about an inch, and crease the fabric. If your fabric isn't easily creased, use pins. Make sure the fold is as straight as possible. I used "Duck" fabric, which is an amazing canvas material that creases and sews very easily.

Sew the fold down, leaving plenty of space to shove the drawstrings through later. Repeat on the opposite end of the fabric.

Now when we fold our fabric in half, we should have two holes/tubes along the top edge to put our drawstrings in.
Depending on whether you want a straight bag or a round bag, this step could be skipped, but in our case we wanted to match the curvature of the chair, so we made a template to trace onto the folded fabric. (Note - this is all done with the reverse side of the fabric showing.)

We added our eyelets (which I'll cover in the last post of this series), and then sewed around the edges to seal our bag.

Finally, we cut off the unnecessary fabric (in this case, our corners).

Here we go!

And turning the whole thing inside out..

Sewing complete! Last step to come is the drawstring attachment!

Anyone else breaking out the sewing machine for their wedding?

Tuesday, December 15, 2009

The Fit-Penga Plan - Part 2

After re-aligning my diet, I could then begin on the second half of my weight-loss plan:

Exercise

This is the real meat-and-potatoes of my weight loss journey. As I mentioned, I went to the library for some research. Well, the Bay Area, in all it's glory, has an amazing library system. They have an entire section devoted to workout DVDs. Over the course of 5 months, I think I've checked out two dozen or so. By genre, here's what worked and didn't work for me (click on the names for more info about the particular genre, definitions by dictionary.com):

Yoga - "2. any of the methods or disciplines prescribed, esp. a series of postures and breathing exercises practiced to achieve control of the body and mind, tranquillity, etc."

I love yoga, and the DVDs were great for stretching and relaxing. But I just felt that they weren't getting me anywhere weight-wise.


Pilates - "A system of physical conditioning involving low-impact exercises and stretches, performed on specialized equipment."

These were killer on the muscles, and I enjoyed them immensely, but most of the DVDs required extra equipment (like that inflatable ball thing) and all I had was a yoga mat and some hand weights.


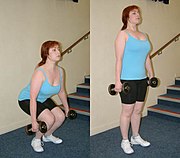
Weight-training - "weightlifting done as a conditioning exercise."

There's nothing quite like realizing you have muscles for the first time. Maybe they don't help for weight-loss, but having your arms feel powerful is a great feeling.


Dance - In secret, these were totally fun, but I didn't use these too much since Sak kept laughing at me. Nothing shelves a DVD faster than making a girl feel self-conscious! These two are my highly recommended favorites though:


Kick-Boxing - "A form of boxing in which the gloved combatants may also kick with bare feet."

Once again, great for making you feel powerful, and a perfect stress reliever!


Cardio Aerobics - "1. Also called aerobic exercises. (used with a plural verb) any of various sustained exercises, as jogging, rowing, swimming, or cycling, that stimulate and strengthen the heart and lungs, thereby improving the body's utilization of oxygen."

This is the type I ended up using the most. I felt they had the greatest impact on weight loss, as all the running and jumping certainly made me the most sweaty!


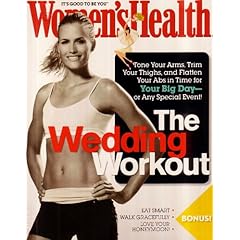
After trying out so many DVDs, I settled into a few that really seemed to fit me best. This one became my favorite, and strangely enough, it is marketed towards brides:

They have week plans set up, based on the shape of your gown (gimmicky sounding, I know). The basic idea is, if you have a strapless dress, you'll want to work out your arms more, whereas a form-fitting mermaid would accentuate the legs, etc. You can also customize, if you don't like the way the set-plans are arranged. With one, 30 minute session each night after dinner, I saw results. And results are a good thing, because there is nothing more frustrating than trying your hardest without seeing changes.

But with all things, you eventually reach a plateau. When the workouts started getting easier, and I was no longer seeing results, I stepped up the game and put myself on the waiting list for the infamous 30-Day Shred.

If Jillian can't help me, no one can, right?

She did help, and I jumped off the plateau with ease. (Though finding motivation to do her grueling workouts was TOUGH.)

And all was well in the world...until Winter came. Suddenly, it was too cold to exercise. All I wanted to do is snuggle in bed or on the couch with a cup of hot something.

And I didn't resume exercising. In fact, I haven't used a DVD or lifted a weight since October. But I did try something else. I work in a high-rise, and instead of riding the elevator up to the double digits to where my cubicle resides, I've taken on the chore (it IS a chore), of walking up and down the stairs once a day. We're talking the 14th floor here.

And 22 pounds later, that's where I am today. Taking the stairs and watching the rice.
Yay!

I'm content at this point, so I'd like to at least maintain it. I'm going to continue my methodology, so if I continue to lose a little more, I'll be happy. But I think I'm done pushing the envelope.

But the best part? Now that I've reached my goal, I can start construction on my dress! Woo-hoo! We'll be making the first cuts in January!

Anyone else have a fitness regiment? What worked out best for you?

The Fit-Penga Plan - Part 1

Friends, it is with no small amount of pride that I write this post today. A post that I have waited five months to have the pleasure of writing.


I have reached my fitness goal!

Last time I wrote about how to best hide the size differences between Sak and I, and I mentioned the inclusion of some personal fitness goals. Where did these goals come from? Well, simply enough, they came from my Wii Fit.

The first weekend after becoming engaged, I stepped on the board/scale, and it spit out my weight and asked me to set a goal for a middle-of-the-road, normal BMI. Now we could talk about how BMI isn't necessarily a good measure of fitness, since it's height and weight ratio doesn't take into account muscle mass - but for all intents and purposes, it works okay for people like myself who have no muscles to impede the calculation.

Turns out I was on the very edge, floating between the "overweight" and "normal" cut-off line. 21 pounds would get me to the middle of the "normal" range. I balked at the number a little, threw in a bit of whining, but eventually got myself over to the library.

There I did some research, and came up with my plan. Like many wellness plans, it consists of two parts - diet and exercise.

Diet

I love to eat, so I was very perturbed by the idea of restricting my foodage. I ended up compromising with myself. Eat healthy, healthy, healthy at work (breakfast/lunch/snacks), and then eat something that makes me happier at home for dinner. This way I could get the benefit of healthy eating, while not restricting myself completely. And while my lunches have been somewhat boring (salads, low sodium veggie soups, etc.) for the past five months, it's not too bad. One plus being that I don't feel lethargic at 2:30 PM due to food-coma anymore.

For dinner, Sak decided he'd help me by joining me in the adventure of eating healthier. (Though he still has his not-so-secret stash of chocolate and Sky Flakes crackers he refuses to give up.)

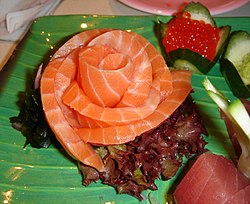
Me: "Does this mean I can go on a sashimi diet? I think I could handle that."
Sak: "...No! We'd be totally broke!"

Mmmmmm(source)mmmm...

I won't lie - we are spending more on food. Leaner meats cost more, whole wheat costs more, veggies can add up if you buy them out of season. I'm chalking it up to the price of being healthy, but if we were smarter about checking ads for deals, we could probably avoid this problem.

My biggest food hurdle, however, was rice. We are big rice eaters, and used to make 2 cups a night to go with dinner. I pared it down to 1 cup, half of which consists of brown rice. Of that one cup, Sak gets 3/4, and I get 1/4. This was the hardest thing to do, and it still makes me somewhat sad. But like everything else, it's not too horrible, you get used to it over time.

That's it for the diet. Less rice, healthy lunches. Simple, no?

Did you start a wellness plan specifically because of your wedding? How do you keep things "on the healthy side"?

Sunday, December 13, 2009

Close Encounters of the Dress Kind

Coming up at the end of next month is our scouting trip to Hawaii. My parents, who are high school sports photographers, will be taking more engagement pictures this time. Hopefully with more knowledge of "couple-photography" and less "diving-for-touchdowns".

So while Mom is studying composition, I am tasked with finding some outfits.

Unfortunately, however, I'm a bit...shall we say, fashion-challenged. Not in the sense that I think unflattering things look good on me, but more like I have a hard-core case of apathy.

Maybe it's because I work in an environment where they don't seem to care much for clothes. Maybe it's because my mother never instilled any knowledge of fashion in me as a kid, and "What Not To Wear" hadn't aired yet. Maybe it's because I'm a big nerd, and always thought it more fun to wear screen printed anime/starwars/80's pop culture tees rather than the hip & cool trends of the time.

But it's probably just because I'm a cheapskate. I shop for clothes maybe once a year. Most of my clothes come from birthday gifts, actually - my loving family reaching out benevolently to the sad, 24 year old woman that still wears the same clothes from high school.

So it's no surprise that my family offered to help pick out my engagement picture outfits. Thank the maker for them!

Here's what they picked out for me (please excuse my mess of a house):


These are from Macy's, where my aunt works. Hello, discounts! Can you see she really likes a certain color-combo? Bold is beautiful, dah-ling.

This plaid number comes from American Eagle, courtesy of another aunt. Light, frilly fun!


Okay, I admit, Mom and I pulled these from the 75%-off rack at Target. But whatever, they are airy and super comfy.

And just for kicks, I also tried on this old dress, which I've had since middle school. (Can't believe I fit it again!)

To make my dress collection complete, I think I need one more, hopefully a solid colored, longer, flowy beach dress. Maybe I'll hit up some goodwill's before we go. Notice that all the above dresses are printed. I've heard a rumor that printed dresses don't come out so well in pictures. Am I better off with solids? Help educate a girl, please? :)

I asked Sak what he'd like to wear, to be met with the usual "I-don't-really-care" shrug. I'd love to see him low-rise man-jeans, but he has denim-phobia, and has never and will never wear any. So I'm thinking his usual khakis and a white cotton shirt. If I do end up finding a solid colored dress, I'll let him wear one of his printed aloha shirts. Matching muumuus maybe?
I don't think Sak would go for something like this...

So tell me, am I the only one that needed help to pick out her engagement shoot outfits?